How to play the first position on violin - a step-by-step guide for beginners
- Rebeca&Leon

- Aug 27, 2024
- 2 min read
Updated: Oct 21, 2025
Do you want to start learning the violin, but you have no idea how to put your fingers on it? Here is how to play the first position on the violin, a step-by-step guide for every note. And yes! There are many other positions on the violin!
How many positions are on the violin?
The most used positions on the violin are the first five, but advanced violinists can use seven, eight, nine, and even more positions, depending on the repertoire. In this article, we will talk about the first one, which is the standard, and easiest position for beginners!

First position violin:
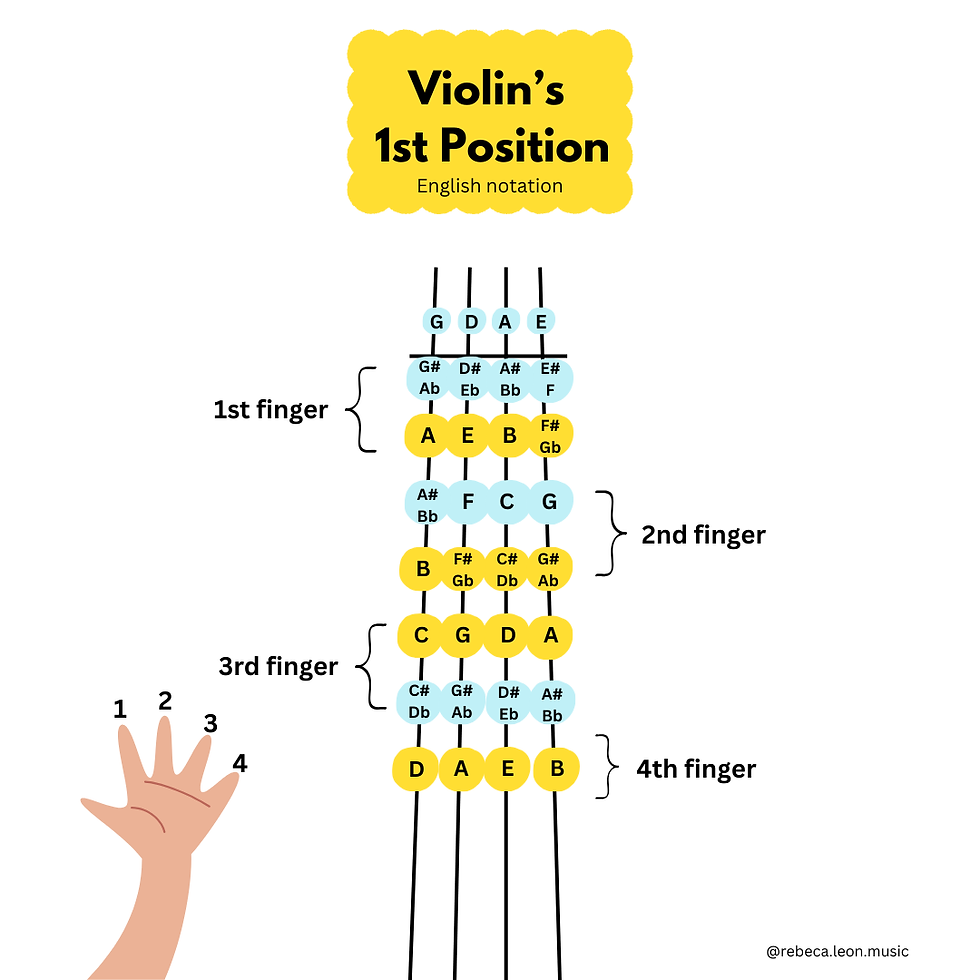
Here is a chart for every note in the first position on the fingerboard. We are using 4 fingers to press the strings, the thumb doesn't have a specific number, its name will remain "the thumb".
The index finger is the 1st finger. It has to be pressed round, right beside the nut, or at a little distance (depending on which note you play).
Second Finger (Middle Finger): This finger should be positioned close to the first finger, creating a natural, smooth curve.
Third Finger (Ring Finger): Place it further along the string, in alignment with the second finger.
The pinky, which is the fourth finger should extend naturally, resting on the string with a slight curve.
For extra help, you can watch the tutorials from our Instagram page, to see how to play this: on G, on D, on A, and on E.
Download the chart here:
The notes on the treble clef:

G string

D string

A string

E string


Comments